You try to reset your computer with “Reset this PC” feature to refresh the system or perhaps repair it. However, instead of resetting, your system gives you a shock in the form of an ‘insert your Windows installation or recovery media’ alert. Your stomach bottoms out with fear thinking you might have to reinstall Windows from scratch.
But wait, do you really need to do that? Find out in this post why this frustrating issue arises, and how to fix it in 5 ways. We’ll also disclose what to do to prevent its recurrence in the future!
Part 1: What Does ‘Insert Your Windows Installation or Recovery Media’ Mean?
A malfunction like ‘insert your Windows installation or recovery media’ on Windows 11/10 signifies your computer needs a Recovery disk or installation media to fix system. This happens when you try to reset your computer with “Reset this PC” which can repair/refresh system without needing to manually reinstall Windows.
But, instead of resetting, your system displays ‘insert your Windows installation or recovery media to continue’ message. This might be caused by certain errors or corruption which you cannot resolve through standard booting. The errors/corruption could happen for a few reasons such as:
- Incompatible Drivers – After a Windows update, outdated drivers can cause startup issues, prompting the system to request recovery media.
- Disabled Windows Recovery Environment – WinRE may be disabled accidentally or intentionally in system settings.
- Boot Configuration Issues – Errors in boot settings, often from failed updates or improper shutdowns, can prevent Windows from finding essential startup files.
- Bad Disk Clusters – Hard drives can develop bad clusters if your PC shuts down abruptly, like during a power outage. This can prevent Windows from accessing boot files, causing errors.
- Missing or Damaged Bootloader – The Bootloader, critical for starting Windows, may be damaged or deleted due to corrupted records or software conflicts.
- Corrupt System Files – Installing and uninstalling apps over time can corrupt Windows system files, especially if a program contains malicious code.
- System File Mismatch – Incompatible or altered system files can cause errors, prompting the need for recovery or installation media.
Bonus Tip: How to Recover Data from Unbootable PC Easily and Quickly?
A problem such as ‘insert your Windows installation or recovery media’ might require you to reinstall Windows which will erase your files permanently. Therefore, to avoid losing important data, recover your files first using a specialized data recovery tool.
4DDiG Data Recovery could be that tool for you as it can reclaim all files from unbootable or inaccessible drives instantly and easily. It can also retrieve data lost due to corruption, formatting, deletion, and much more. Here’s more info about this software:
- It is capable of recovering data from inaccessible, unreadable, RAW and unbootable storage devices.
- It allows you to pick file types to scan and offers free inspection of recovered files.
- It can retrieve files you might miss due to system crashes, lost partitions, virus attacks, and much more.
- It can reclaim 2000+ categories of files including audio, videos, images, documents, etc, from unbootable drives.
- Impressive success rate and polished interface.
Following are steps to retrieve data with this tool from your unbootable disk:
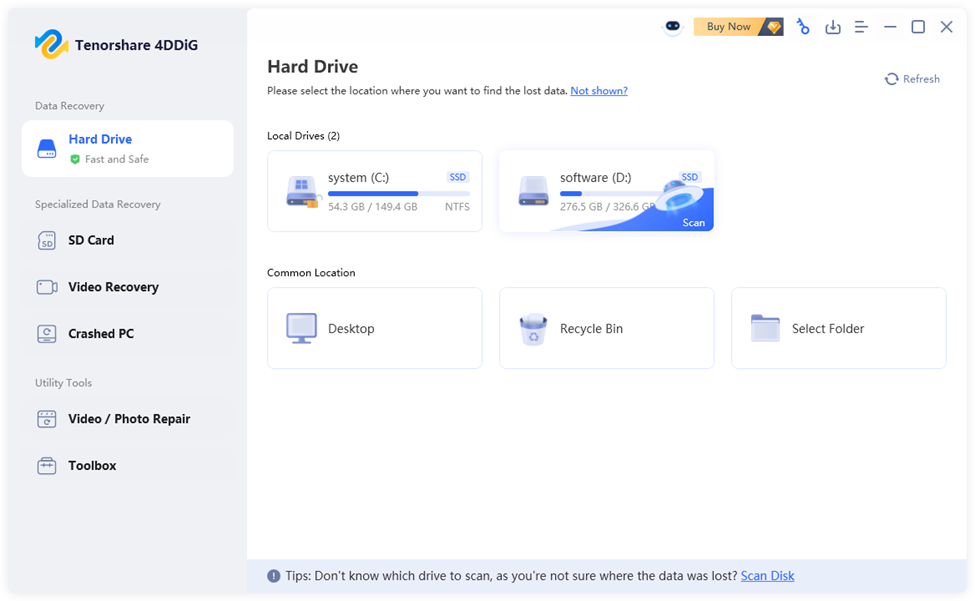
Step 1: Download, install, and execute this unbootable drive recovery tool on your computer. Then, choose your inaccessible disk, and pick file types to scan. Hit “Scan.”
Step 2: The tool will begin scanning process which you can pause or stop once you find your desired files.
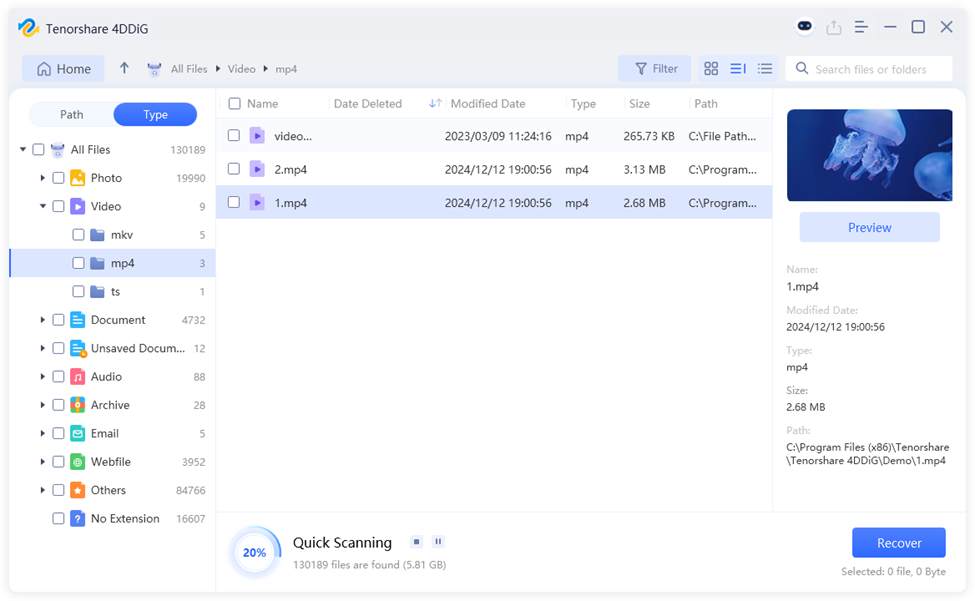
Step 3: Hit “Recover” to shift all your chosen recovered files to OneDrive or Google Drive. Later, after you fix the issue like ‘could not find the recovery environment Windows’ on 10/11, you can restore them to your computer.

Part 2: 5 Ways to Fix ‘Insert Your Windows Installation or Recovery Media’ on Windows 10/11
Learn how to fix ‘insert Windows installation or recovery media’ using 5 methods. But try other repair methods first, before you consider resetting Windows, which should be your last resort:
Method 1: Run the Reagentc/Enable Command
If you’re getting an error like ‘could not find the recovery environment Windows’ on 10 /11, it could be because WinRE is disabled, corrupted, or misconfigured. But the Reagentc/Enable command can locate the recovery file (Winre.wim), configure it in boot options, and enable it for use, removing need for external recovery media. Here’s how to fix ‘insert Windows installation or recovery media’ issue:
Step 1: Right-click on the Windows button, and then run the Command Prompt app with admin privileges.
Step 2: Tap “Command Prompt.” Then, type following command. Hit “Enter” afterward:
- reagentc /info (This will check if WinRE is enabled).
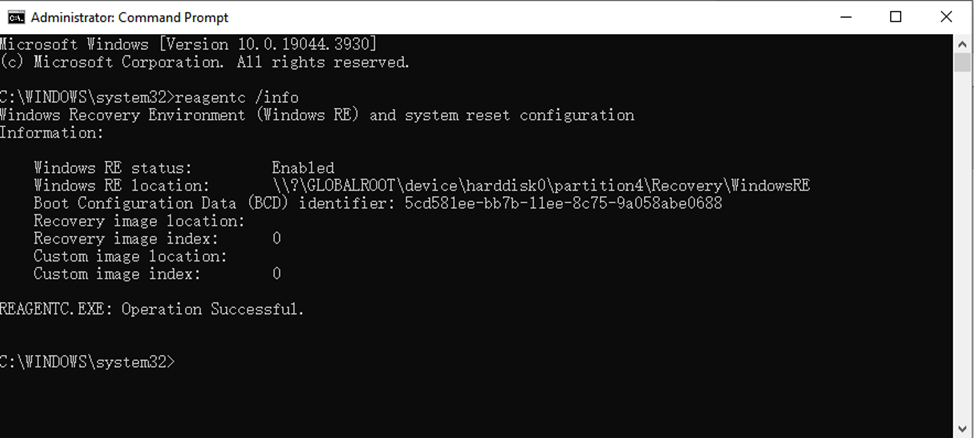
Step 3: If disabled, use “reagentc /enable” to switch it on.
Method 2: Run an SFC Scan
In some cases, system file errors may also trigger this Windows error. So, run SFC command, which is a built-in Windows tool that scans and uses a stored cache of system files to fix critical issues. Here’s how to execute SFC to fix ‘insert your Windows installation or recovery media to continue:’
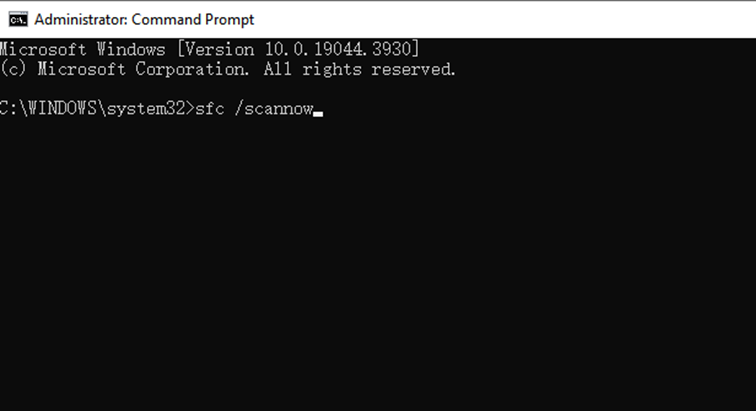
Step 1: Begin with opening the Command Prompt tool.
Step 2: Then, type following command. Hit “Enter” afterward:
- sfc/ scannow
Method 3: Run the DISM Tool
In case, SFC doesn’t fix a glitch such as ‘insert your Windows installation or recovery media’ on Windows 11/10, use DISM. It’s also a Windows-embedded utility that can repair the Windows image and component store, using Windows Update to access latest file versions if needed. Follow steps below to use DISM to resolve ‘could not find the recovery environment on Windows 10/11’ issue:
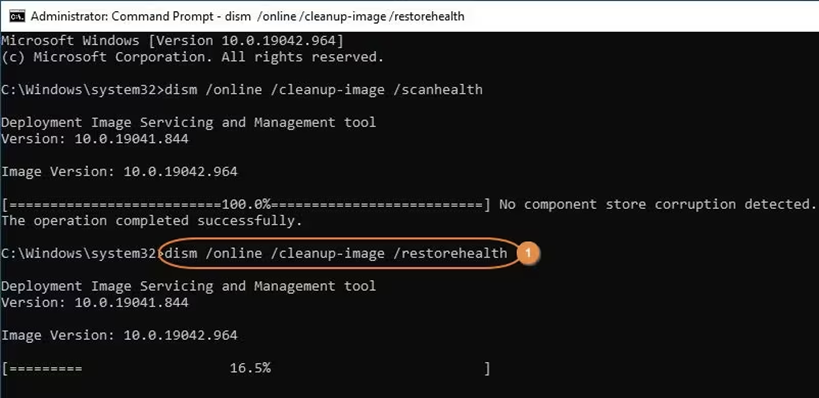
Step 1: In Command Prompt, type following commands. Hit “Enter” after each one:
- DISM /online /Cleanup-Image /ScanHealth
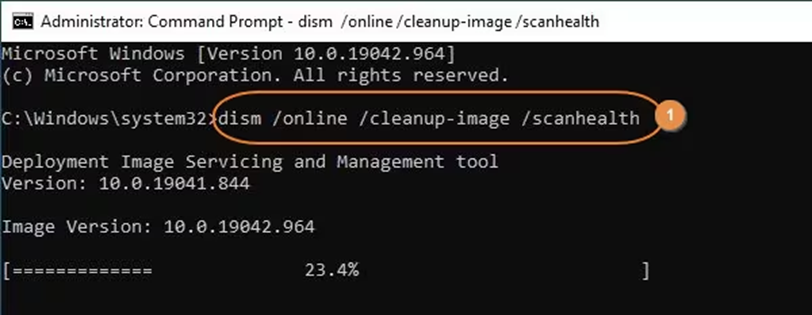
- DISM /Online /Cleanup-Image /RestoreHealth
Step 2: Reset your PC to check if the problem is gone.
Method 4: Create a Recovery Drive
You can also resolve ‘insert your Windows installation or recovery media to continue’ with a Recovery Drive. Do this by providing a bootable copy of Windows Recovery Environment. This allows you to access recovery tools even if your main Windows is damaged. Check out instructions below:
Step 1: Use an empty USB drive (32 GB or more) for creating files for Windows recovery. You must have created it prior to your drive becoming unbootable or you could create it from another computer. Here are steps to create it:
- Type “Recovery Drive” in Windows search field. Open it.
- Then, make certain that “Back up system files to the recovery drive” box is tick marked.
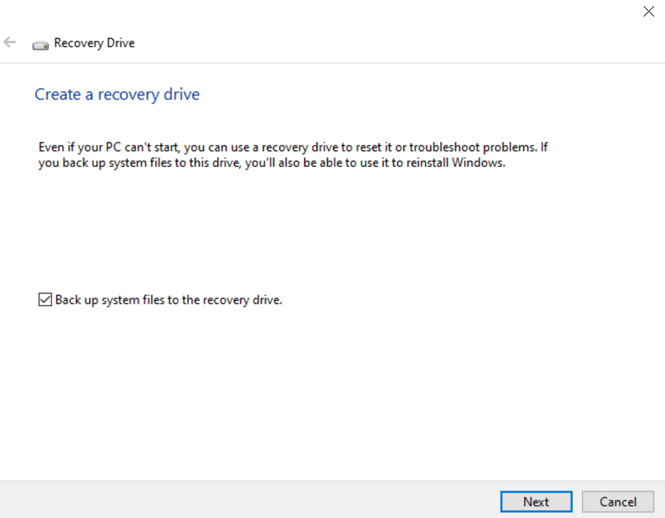
- Click “Next.” Then, pick your USB. Next, hit “Create.” Finally, tap “Finish.”
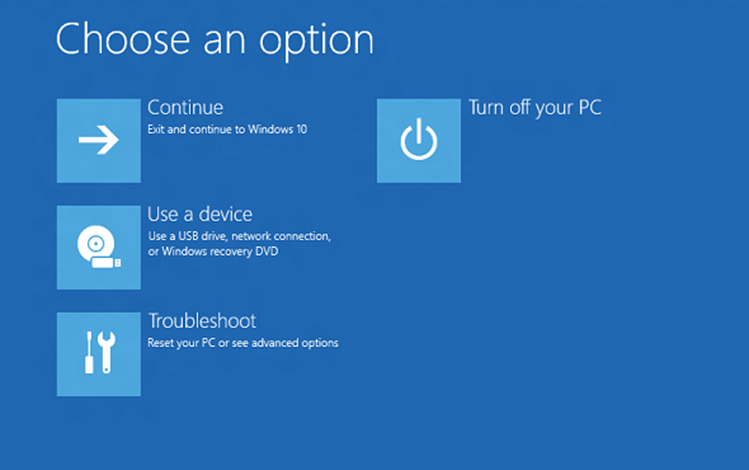
Step 3: Then, connect Recovery Drive to your unbootable PC. On “Choose an option” window, pick “Use a device.” Then, choose your recovery USB to begin recovering your computer.
Method 5: Reset Windows
As a last, attempt you can reset Windows when you receive the error ‘could not find the recovery environment on Windows 10/11. It’s perfect for a situation where your PC is unable to boot. This method will overhaul Windows, removing third-party apps, and resetting settings in the process, says Microsoft. You also get the option to keep your personal files. Here’s how to fix ‘insert Windows installation or recovery media ‘ problem:
Step 1: Power on your computer. Then, force restart it during boot three times to trigger “Automatic Repair Mode.”
Step 2: If your Windows fails to start, follow next steps:
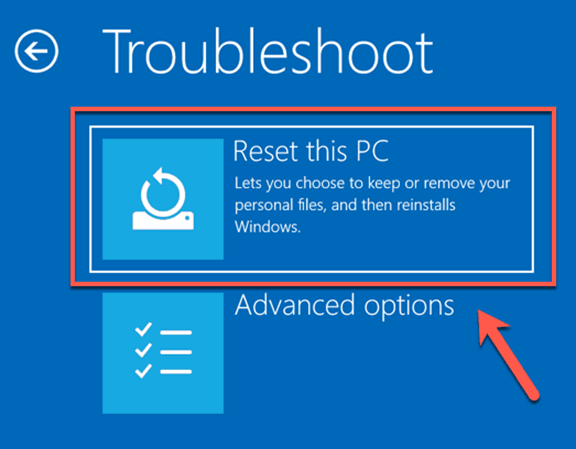
- On “Automatic Repair” screen, tap “Advanced options,” Then, select “Troubleshoot.”
- Choose “Reset this PC” beneath “Troubleshoot.”
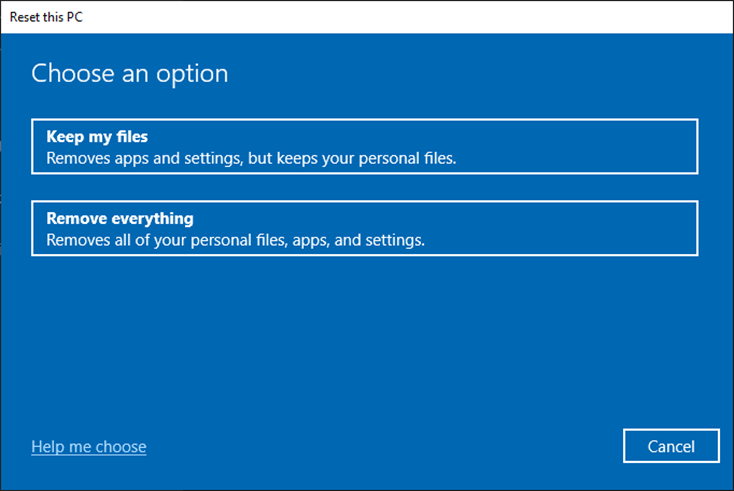
- Pick “Keep my files.” Or select “Remove everything.” Then, tap “Cloud download.” Or choose “Local install” for reset method.

- Follow on-screen steps to reset Windows.
Part 3: How to Avoid the ‘Insert Your Windows Installation or Recovery Media’ Error?
After resolving ‘insert your Windows installation or recovery media’ you must also take some concrete steps for the issue to not bounce back. Here’s a list of things to follow in order to avoid it:
- Keep Windows Updated – Head to Start > Settings > Update & Security > Windows Update. Then, click “Check for updates” to update your Windows regularly to ascertain stability and avoid issues.
- Shut Down or Restart Properly – Always use Start > Power > Shut down/Restart to prevent file corruption and hard drive issues.
- Run Disk Checker – Open Command Prompt as admin and run “CHKDSK C: /R” to find and fix disk errors automatically.
- Update Drivers Regularly – Use Device Manager to manually update drivers: Right-click Start > Device Manager, select device, right-click it, and choose “Update driver.”
Conclusion
The ‘insert your Windows installation or recovery media’ message signifies an issue that halts Windows from booting or accessing recovery tools. This happens mostly because of a disabled Windows Recovery Environment or boot issues as well as attached peripherals, says Intel.
To overcome them, we’ve shared five solutions in this post. But before you try them out, we also recommend using a helpful tool like 4DDiG Data Recovery to reclaim files from your unbootable drive. It can also retrieve data from various data loss situations with a high success rate.


